Steps for Starting a Home Vegetable Garden
Before you create a vegetable garden on your property, there are 2 vital pieces of information you need for success. One is your USDA cold hardiness zone and the other is the average first and last frost dates for your area. How to use this information is described later in the steps below. To determine your hardiness zone, see the U.S. interactive map at https://planthardiness.ars.usda.gov/PHZMWeb/. Multiple websites are available to determine your frost dates and they may vary somewhat from each other, depending on the method used to determine them. Here is one: https://www.weather.gov/iwx/fallfrostinfo. Since data may be several years old, many areas are noticing a shift to a slightly warmer zone. It can be helpful to begin recording your own frost dates for your very specific area. With these 2 pieces of information you can determine when to plant any vegetable and whether it will be hardy in your area.
If you don’t already have a garden area:
- Choose your garden location, usually the sunniest spot on your property. If you’re beginning your garden in spring, account for any deciduous trees that may block light when they’re leafed out. Easy access to the kitchen is a plus. If the land has some slope and you’ll garden in rows, align the rows perpendicular to the slope to decrease runoff. Otherwise align them east to west for best sun exposure. Also keep in mind that taller or trellised plants should be located where they won’t block the sun from shorter plants. Some crops can get by with a little less sun than others so shadier spots in your garden can be reserved for them.
- Remove existing vegetation from your garden site. Many people do this by tilling but alternative ways are healthier for your land. If you’ve planned ahead about 6 weeks during some hot weather, the area can be covered with plastic to rid herbaceous vegetation through solarization. The harmful effects of spraying with herbicides like glyphosate is becoming more evident. A good option is to create raised beds. These take minimal site preparation since you are building the soil on top of existing land.
- Create your beds. You can create raised beds, mark off traditional rows, or even combine advantages of both by creating raised rows in a traditional bed. Raised beds are especially advantageous where soils are difficult to work, or lack nutrients or good texture. Gardening in raised beds also avoids tilling, which can contribute to topsoil loss, increase weeds by bringing seeds up where they will germinate, and destroy the structure of the soil and the beneficial organisms living there. Many websites describe how to build a raised bed. They can be built any size but limiting them to 4’ wide allows you to reach from both sides without walking into the bed. Raised planters complement square foot gardening, first proposed by Mel Bartholomew, which has become a popular and efficient way to garden.
- Create your soil. If you’ve built raised beds, it’s time to create your soil mix. A 1-1-1 mix (by volume) of compost, peat moss and vermiculite make the perfect soil. If you don’t have your own garden compost, then combine different kinds of store compost to ensure you’re putting a variety of nutrients into the mix. Once the planters are filled, mark off 1’ by 1’ squares with a sturdy grid. One-inch-wide strips of wood lath work well for this and give you a constant point of reference for spacing your plants correctly.
- Add fertilizer. You have a choice between organic and inorganic fertilizers. Both are available in either dry or liquid options. The main difference between them is that inorganic fertilizers are soluble in water and immediately available to the plant. So, if plants have started to slow their growth or yellow, this chemical-type fertilizer is a good option for quickly correcting the problem. Organic fertilizers, on the other hand, have to decompose before the nutrients are available to the plants, but the nutrients will be available for a much longer time, are less likely to burn if over applied and will help to build the soil and the organisms that also feed your plant. If you have created raised planters with plenty of organic material, you may need little fertilizer during the season, but starting with a high-quality slow-release organic fertilizer ensures good growth without harming plants or the environment. Row crops or plants grown directly in the ground can have compost and fertilizer worked into the top 6 inches of soil.
- Decide on the crops you will grow and determine planting dates. Your hardiness zone will help you determine whether a particular plant will thrive in your part of the country. For example, many tropical plants will not have a long enough growing season to produce in more northern climates. Based on the hardiness of a plant, your seed packet will suggest a time to plant in spring in relation to your average last frost date. This will allow the plant to start growing as soon as it’s safe. Many crops will have time to produce if planted after this date and planting every couple of weeks can spread out your harvest. However, most spring garden crops shouldn’t be planted in the heat of summer. For fall, the seed packet’s “date to maturity” (the average number of days from planting to harvest) is used in combination with your average date of first frost. You may want to add 14 days to this number since plants grow more slowly in the fall. From your first frost date, count back this number of days to determine the latest you should plant. The hardiness of the plant is taken into account here too. Some crops can take light or even heavy frosts. Some may even taste better when harvested after cold weather. In order to get a jump on the garden, some crops may need to be started early indoors, either to avoid the winter cold for spring, or the summer heat for fall. The seed packet will supply this information too. In addition to relying on the seed packets, you can also use a gardening calendar for your zone, often available from your county cooperative extension agent. Search for your county within a state list here: http://npic.orst.edu/pest/countyext.htm.
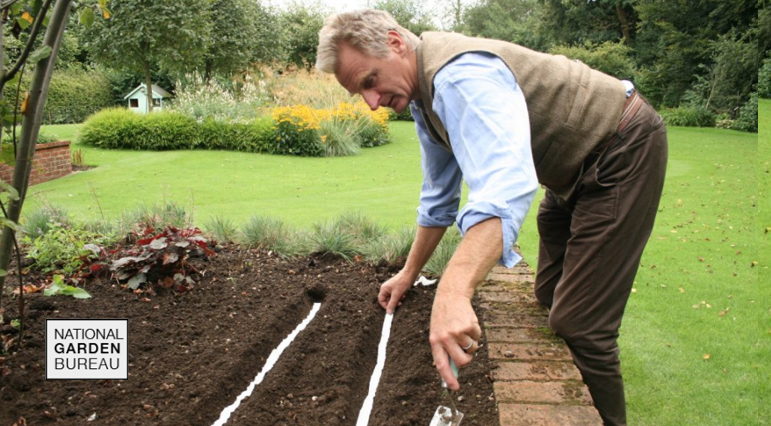
- Plant your garden. Before planting, spray the soil to moisten it thoroughly. Seed packets will list the sowing depth and spacing, but generally seeds are planted at a depth about equal to their size or a little deeper. Square foot gardening guides list the spacing for both plants and seeds if you are using this method. Position trellises as you plant transplants. Consider planting some crops in two-week intervals to keep a manageable amount coming.
- Water your new plants or seeds in lightly and keep moist. A serpentine soaker hose run through the bed beneath the soil surface is an efficient, water-wise practice.
- Check on your garden daily to keep ahead of any pest problems and weeds.
- Fertilize if plant growth slows or leaves start turning yellow. About every 3-4 weeks throughout the season, you can apply fertilizer (herbs at half strength).
- Harvest often.
If you do already have a garden area:
- It’s helpful to record the varieties you grew and include any notes you want to remember for the following seasons. This will also help you rotate crops by avoiding successively growing crops from the same family. Crop rotation helps to increase soil fertility and break the life cycle of disease organisms and pests.
- Clean out spent crops and remove any other debris. Don’t compost anything that looks diseased, as composting may not kill certain diseases and nematodes. Work in any cover crop if you previously planted one.
- Reinforce raised bed structures if needed or clean up the boundaries of your beds.
- Test your soil to determine if any nutrient has been depleted. You can often do this through your county extension service agent.
- Add composted organic matter. Spread a 3-4 inch layer over the bed and lightly work in.
Reference
Bartholomew, M., 2013, All New Square Foot Gardening, 2nd edition, Cool Springs Press, Minneapolis, MN, 272 pp.
-
128 Raleigh St, NC 27540